How To: Use A Wii Classic Controller To Play Dead Trigger [No Root][Update]
[Update: Currently the WiiMote App cannot connect to devices running Android 4.2 but the developer is looking into a fix.]
My biggest gripe with trying to play console quality games on a mobile device has to do with on-screen controls. No matter how accustomed to them I become, they just don’t offer the same precision and/or experience as do physical controllers. I find playing FPS games with on-screen controls to be close to unbearable. Maybe I’m just old school, but give me a controller over onscreen controls any day.
One game I’ve been playing a lot of recently is Dead Trigger. I’ve seen various methods for hooking up a PS3 DualShock 3 controller to use with Dead Trigger but I was put off by the fact that you need to root your device in order to use the DualShock 3 wirelessly. Sure, you can use an OTG cable, but I hate the limitations involved with having to be wired into your device via a cable. Plus, if you don’t already own a PS3 DualShock 3 controller, you’re going to have to buy one and they’re pretty expensive.
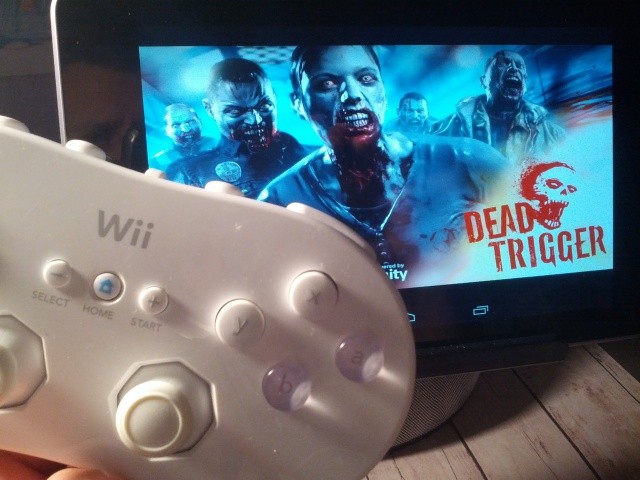
I often game on my Android devices using a Nintendo Wii Remote and wondered if it’d be possible to use a peripheral such as the Wii Classic Controller to play a game such as Dead Trigger, without needing to root my device. Sure enough, it is possible, and after painstakingly figuring out the right control mappings, it works even better than I expected.
This was good news for me, since I already had the Wii Remote and Wii Classic Controller, I was now able to play Dead Trigger using a controller that didn’t need to be plugged into my device and didn’t require a rooted device. That’s a win in my book.
Since it was kind of a pain to figure out the mapping schematics (and I still don’t have a full set), I figured I’d show you guys how I did it and provide you with a list of control functions so that you can easily do this yourself.
Now don’t be shy when it comes to experimenting with other games as well, I’ve used this method with a few tweaks to play ShadowGun and other FPS games as well.
What you’ll need:
- The Game Dead Trigger
- The app Wiimote Controller
- A Wii Remote (not the Wii Remote plus)
- A Wii Classic Controller
Step 1
Download and install both the game Dead Trigger and the app Wiimote Controller from the Google Play Store.
Step 2
Now it’s time to pair and set up your Wii Remote to the Wiimote application. The first thing you are going to want to do is turn on Bluetooth. Once Bluetooth is on, open up the Wiimote application you downloaded earlier. Click on #1: Init and Connect and then press the #1 and #2 buttons on your Wii Remote. The Wiimote app will search for your Wii Remote and connect to it. If it was successful, you will see it say:
Connect to 1 wiimotes.
Setting LEDs…
Done…
Polling button data…
Once your Wii Remote is connected, choose #2: Select WiiControllerIME and then choose WiiControllerIME.
After you do that, go into the Wiimote settings by clicking on the menu icon (3 dots) and then choose Preferences and make sure to check the box next to Switch after disconnect. This will ensure your keyboard is switched back to the Android keyboard after you have disconnected the Wii Remote (simply turn off Bluetooth to disconnect the Wii Remote).
Step 3
Now it’s time to map out the controls for Dead Trigger. I’ll give you a list of corresponding game commands for your Wii Classic Controller and from there you can assign them to whichever buttons you wish. For instructional purposes I’ll be using the setup I created, but feel free to map your setup however you’d like.
List of known Dead Trigger game functions:
Movement
- Move Forward: D-pad up/XP D-pad up
- Move Backward: D-pad down/XP D-pad down
- Move Left: D-pad left/XP D-pad left
- Move Right: D-pad right/XP D-pad right
Aiming
- Aim Up: I
- Aim Down: K
- Aim Left: J
- Aim Right: L
Other
- Fire/Shoot: Number 8
- Reload: Number 7
- Zoom In/Scope: Number 6
- Switch Weapon: A
- Item Slot 1: Number 3
- Item Slot 2: Number 1
- Pause/Menu: Back XPO
- Text 1 (changes in-game font): Numpad 7
- Text 2 (changes in-game font): Numpad 8
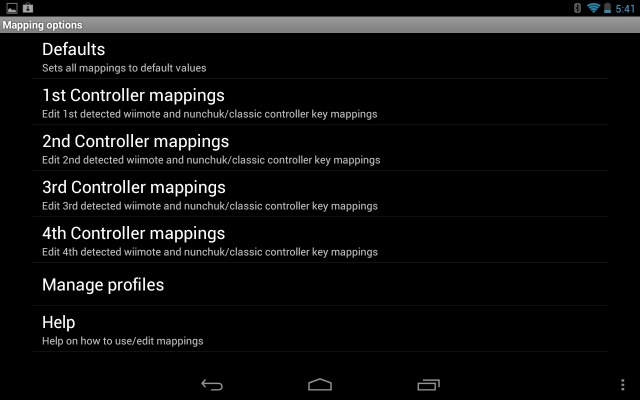
To assign a function to a button on the Wii Classic Controller, first click on the Menu button (3 dots) from within the Wiimote Controller app and then select Preferences > Mapping options > 1st Controller mappings (or whichever one you want) and then scroll down to the 1st classic controller (CC1) section.
From there, simply select the Classic Controller button you wish to assign a function to and then choose the function (see Dead Trigger function list above). You can also save your setup under Save as profile (name it Dead Trigger). Then whenever you play Dead Trigger, simply load up that profile and you’ll be good to go.
My Setup
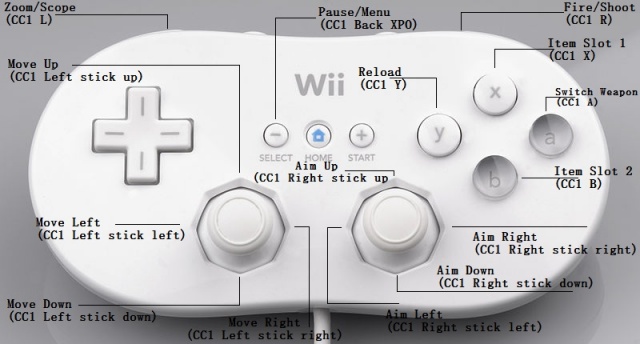
This is how the mapping on my setup would look in the Classic Controller settings:
- (CC1)Left stick up: D-pad up/XP D-pad up
- (CC1)Left stick down: D-pad down/XP D-pad down
- (CC1)Left stick Left: D-pad left/XP D-pad left
- (CC1)Left stick right: D-pad right/XP D-pad right
- (CC1)Right stick up: I
- (CC1)Right stick down: K
- (CC1)Right stick left: J
- (CC1)Right stick right: L
- (CC1)R: Number 8
- (CC1)L: Number 6
- (CC1)Y: Number 7
- (CC1)A: A
- (CC1)X: Number 3
- (CC1)B: Number 1
- (CC1)Select/-: Back XPO
Step 4
Launch Dead Trigger and let the bodies hit the floor! See it in action below.
Feel free to contact me with any questions and I’ll do my best to get you set up. Cheers!


